University Information Technology Services
Learning Technologies, Training Audiovisual Outreach
Windows 10 Backup Restore
In the event that you need to recover files, you have the ability to restore data from Windows backup. The following explains how to create a backup and restore data from your backup.
Recovery Using a Recovery Drive
You will need an external drive to store the backup. Connect it to your computer and follow the steps below:
Setting up your Backup
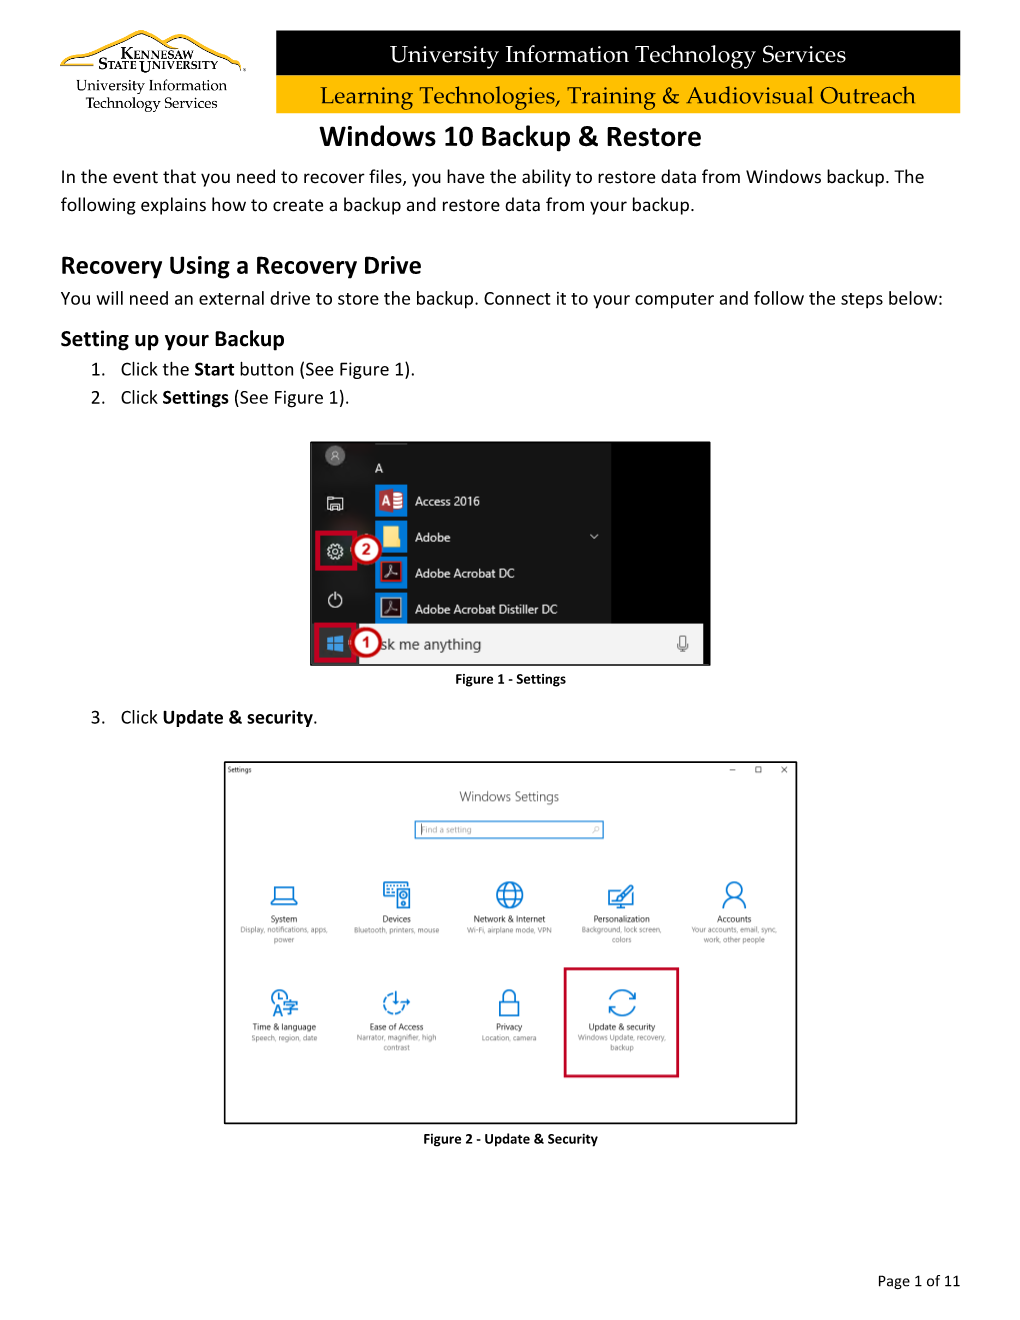
1. Click the Start button (See Figure 1).
2. Click Settings (See Figure 1).
Figure 1 - Settings
3. Click Update security.
Figure 2 - Update Security
Page 1 of 11
4. Click Backup.
Figure 3 - Backup
5. Click Add a drive.
Figure 4 - Add a Drive
Page 2 of 11 6. The Select a drive window will open to display all available drives. Click the drive you want to use.
Figure 5 - Click the Drive
7. After selecting the destination drive, Windows 10 will set Automatically back up my drives to the On status. If you want to configure the backup options, click More Options.
Figure 6 - More Options
Page 3 of 11 8. The Backup options window opens displaying the folders included in the backup as well as drop-down menus and buttons to modify settings for your backup. a. Click Back up now to begin an immediate backup of your folders (See Figure 7). b. Click the drop-down menu to select how often to back up your files (See Figure 7). c. Click the drop-down menu to select how long to retain backups (See Figure 7). d. Click the Add (+) button to add a folder to the list (See Figure 7).
Figure 7 - Backup Options
9. A status of Backing up your data will appear. A backup is now being created.
Figure 8 - Backing Up Data
Page 4 of 11
Restoring from your Backup
In the event that you need to recover files, you have the ability to restore data from your Windows Backup.
The following explains how to recover data from your backup.
Note: You must first setup a backup in order to recover files.
1. In the search bar, type Restore.
2. From the resulting menu options, select Restore your files with File History.
Figure 9 - Recover Your Files with File History
3. Select the files you want to restore (See Figure 10).
4. Click the Restore button (See Figure 10).
Figure 10 - Select Files and Restore
Page 5 of 11
Recovery from a System Restore Point
Recover from a system restore point takes your computer back to an earlier point in time, called a system restore point. Windows automatically saves restore points when installing a new application, driver, or
Windows update, but you can also create a restore point manually. Restoring will not remove your personal files, but it will remove applications, drivers, and updates installed after the restore point was made. The following explains how to create a system restore point manually and restore from a system restore point:
Create System Restore Point
1. In the search bar, type Restore.
2. From the resulting menu options, select Create a Restore Point.
Figure 11 - Create a Restore Point
3. The System Properties window will open to the System Protection tab. Click Configure.
Figure 12 - Click Configure
Page 6 of 11 4. Click to enable Turn on system protection (See Figure 13).
5. Use the Max Usage slider to determine how much of your hard drive to use to store restore points
(See Figure 13).
6. Click OK (See Figure 13).
Figure 13 - Configure Restore Settings
7. Click Create.
Figure 14 - Create Restore Point
Page 7 of 11
8. The Create Restore Point Description box appears.
Figure 15 - Restore Point Description Box
9. Type in a description to help identify the restore point and click the Create button.
Figure 16 - Click the Create Button
10. A restore point is now being created.
Figure 17 - Creating a Restore Point
Page 8 of 11 11. The restore point has been created successfully. Click Close.
Figure 18 - Restore Point Created Successfully
Restore from System Restore Point
1. In the search bar, type Recovery.
2. From the resulting menu options, select Recovery.
Figure 19 - System Recovery
Page 9 of 11 3. The System Properties window will open to the System Protection tab. Click System Restore.
Figure 20 - Click the System Restore Button
4. The System Restore window appears. Click Next to proceed to restore options.
Figure 21 - Click Next
Page 10 of 11 5. A list of restore points will be displayed. Click the date you want to use for your restore point
(See Figure 22).
6. Click Next (See Figure 22).
Figure 22 - Click Next
7. The Confirm your restore point window appears. Click Finish to begin the restore process.
Figure 23 - Click Finish
For additional support, please contact the KSU Service Desk
KSU Service Desk for Faculty Staff
•Phone: 470-578-6999
Page 11 of 11
KSU Student Help Desk
•Phone: 470-578-3555
•Email: service@kennesaw.edu
•Website: http://uits.kennesaw.edu/
•Email: studenthelpdesk@kennesaw.edu
Copyright © 2016 - University Information Technology Services (UITS) - Kennesaw State University
Windows 10 Backup & Restore