Unit: Drawing/Renaissance Art
Project: Grid Drawing (and Anamorphic drawing)
Project: Surrealism - Grid Drawing/Painting (below)
Anamorphic Art - Online Resources below
High School Adaptations - by James Ray - Bryan High School
Have some fun! Start with Greg Percy's song "Are You Serious?" (Dali)
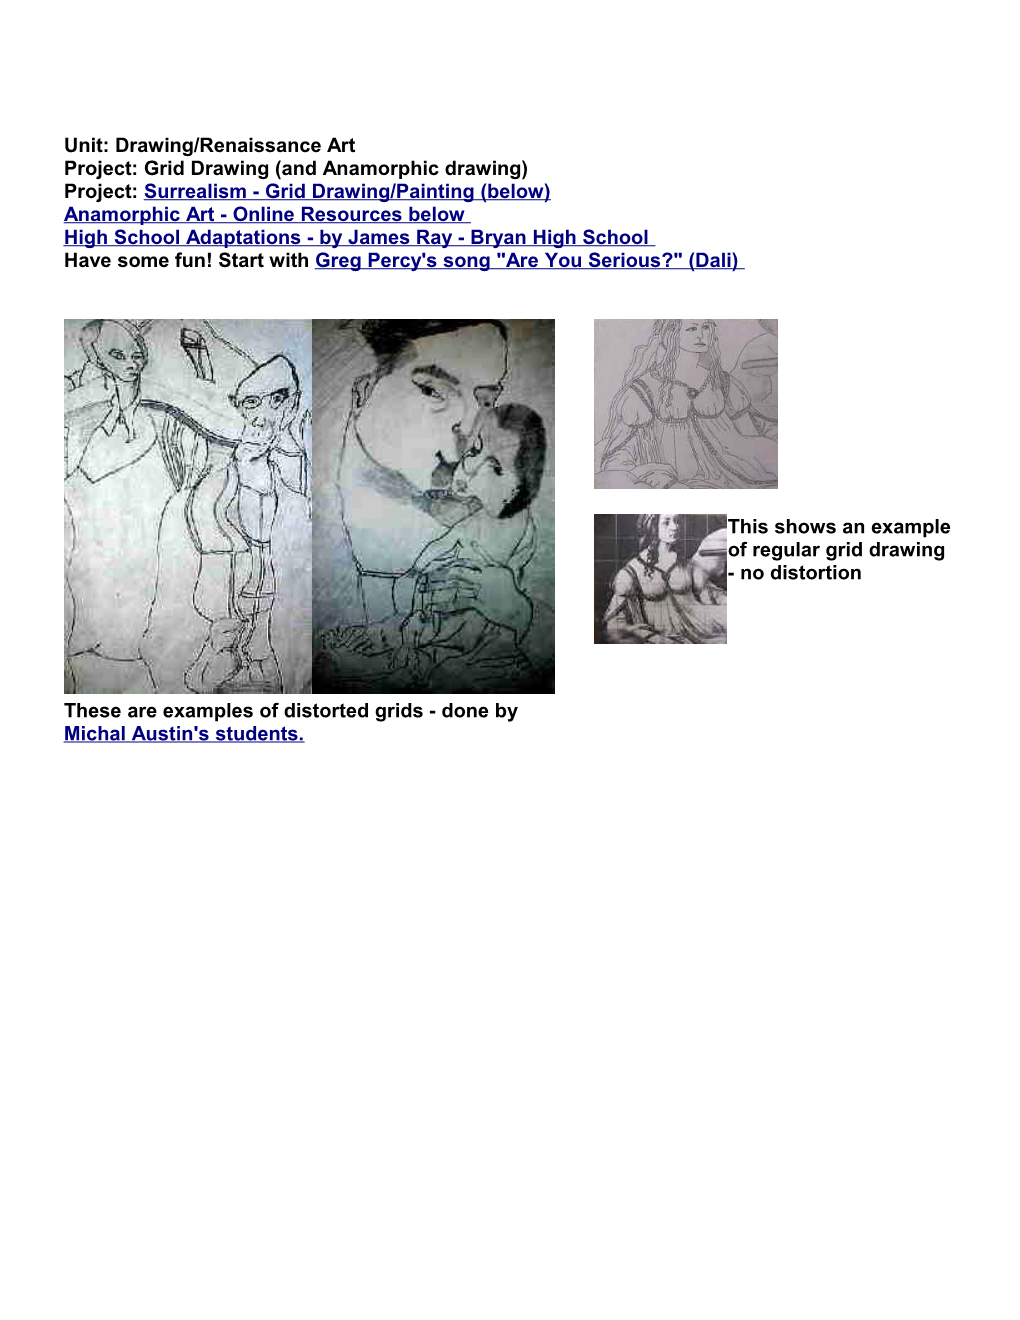
These are examples of distorted grids - done by
Michal Austin's students.
This shows an example of regular grid drawing - no distortion
Information on Grid Drawing
"The underlying idea of transferring information from one grid to another has a long history in both mathematics and art. When the blank grid differs from the original grid, for example, a drawing can suffer intriguing distortions. In art, the result is sometimes called an anamorphic picture. Mathematically, you're looking at the results of a type of transformation or mapping.
To create one sort of anamorphic picture, you start with a piece of paper ruled into square cells and another ruled with the same number of trapezoids. Draw your picture on the square grid. Then carefully copy the contents of each square of the original grid to the corresponding trapezoid of the other grid, stretching the lines of the drawing to make sure everything fits together. You end up with a distorted version of the original picture. Interestingly, if you now look at the final drawing at the proper angle from the edge, it appears undistorted.
Artists have long used the same idea to create visual puzzles. In such examples, a viewer sees an object correctly only if he or she finds the right angle at which to look at the picture. One of the most famous examples is in a painting called "The Ambassadors," made by the German artist Hans Holbein, the Younger (1497-1543). It shows two men standing in front of tables overflowing with books, instruments, and globes (see http://www.mezzo-mondo.com/arts/mm/holbein/HOH006.html). At their feet, the artist painted a weird shape that turns out to be a grinning skull when you hold the picture at a slant and view it in the right way.
Various artists have tried more elaborate schemes. It's possible, for example, to draw or paint a picture so that you can tell what it is only if you look at its reflection in a mirror shaped like a cylinder or a cone. Other pictures must be reflected in shiny spheres, mirrored pyramids, or other reflecting shapes to reveal their true identity." (This information has been copied from Science News Online written by Ivars Peterson. Thank you Mr. Peterson - you are helping many students)
Objectives:
· Gain appreciation for Renaissance art
· Develop math skills in transforming a work of art
· Develop observation skills
· Work on line quality / Materials:
transparencies photocopied with one inch grid -- rulers (for making straight line grids) -- pencils -- erasers -- 12"x18" drawing paper --choice of medium -- small art prints or photocopies
Instruction/Motivation:
1. Present an overview of Renaissance Art (Florence: Cradle of the Renaissance is a good one)
2. Review some of the most noted artists of the Renaissance, characteristics of art, themes in art - review what it meant to say "Man is the measure of all things" - What were Renaissance artists trying to show in their work. (some Online resources - See also Internet Lesson: Art of the Renaissance)
3. Show video "Masters of Illusion" - pay close attention to anamorphic art
4. Demonstrate drawing grid onto 12"x18" paper - distort with waving lines, trapezoidal shapes, or elongated rectangles - or other distortions. (Note from Judy: for my units, students did not distort the grid. Our grid drawings were used as a base for a Renaissance parody painting)
5. Demonstrate enlarging the postcard size print or photocopy block by block.
Procedures:
1. Select post card size print (or photocopy) for enlarging. Tape transparency with one inch grid over post card. Note: Student can draw one inch grid directly onto photocopies if desired.
2. Enlarge grid onto 12"x18" drawing paper. Enlarge at a scale of 1" to 3" - or 1" to 4". Use wavy lines or stretch the grid for a distorted drawing (anamorphic). Example to the right is regular grid - a scale of 1 to 3 was used (paper was 12" x18" - images at right not to scale)
3. Enlarge post card image or photocopy block by block -- paying close attention to line quality and make close observations what is in each block.
4. Note from Judy: In my classes, students wrote a critique about their chosen Renaissance art work. /
This drawing was used as a base for a Renaissance parody painting.
Tip from JC (18 year old): Take a 2" cardboard - cut a 1" square in center with x-acto knife. Use this as a "window" to focus on only one square at a time. JC also suggested working with the original upside down. This student got the idea for a wise art teacher.
Lesson Plan by: Michal Austin
Unit: Surrealism/Painting
Project: Surreal landscape with distorted
self-portrait
Objectives:
· Gain an appreciation for Surreal art
· Use math skills in transforming an
image
· Use imagination - develop problem solving skills - utilize elements/principles of design
· Develop painting skills -- color planning
Preparation: Take digital pictures of students while they are working on previous project
Instruction:
1. Present Surrealism (some Online resources)
2. Demonstrate grid distortion - and demonstrate composition requirements. (for Michal: The background had to have something melting or dripping, something flying, and a vanishing point. / Vocabulary:
Surrealism, distortion, abstract,
vanishing point, perspective,
anamorphic, grid transformation
Materials:
digital pictures of students,
transparency grids, tempera, mixing trays, brushes,
heavy drawing paper, water dishes
Procedures:
1. Place grid over photograph (if desired - grids could be drawn directly on print)
2. Draw a distorted grid on 12 x 18 paper. Make lines wavy and change distance between lines
3. Enlarge photograph block by block - observe closely what is in each block
4. Plan the remainder of composition - Create a Surreal landscape. Requirement: Have something melting or dripping, something flying and have a vanishing point.
5. Plan colors - limit color palette.
6. Select colors for painting - begin painting background areas - vary the value of the paint.
7. Paint portrait showing highlights and shadows.
See the Ugly Zoo - animals and people manipulated with Photo editing software. Some wild creations. Try this with your students. Corpse Cards comes to mind too.
Submitted to Getty ArtsEdNet by James Ray - Bryan High School, Texas
Some High School Adaptations for Grid Drawing
Here is a distorted drawing of one of James' students.
He designed a four by four grid over the picture.
Then made a distorted circular grid.
Four circles by four pie shapes.
Materials: Quality drawing paper, choice of pen and ink or drawing pencils.
Extension: Include a value study in this project.
From James:
Some of my students are Distorting the grid into a circular grid. Where the rows are the overlapping circles and the columns are the pie shapes. (some examples of circular grids may be found on the Math connections site listed below)
Option 1: Simple Enlargement Create a collage of 4 to 10 pictures. Student independently chooses subject matter. Draw grid on collage into equal spacing. Enlarge grid to fit on 18x 24 drawing paper. Transfer picture by drawing to scale. Match value and texture of the original.
Option 2: Foreshortened View Find a source of interest. Draw a grid on source into equal spacing. Design a distorted grid by making the spacing uneven or parallel. Using the correct proportions. Match value and texture of the original.
Option 3: Blotchy Distorted View Find a source of interest. Draw a grid on source into equal spacing. Design a distorted grid by DELETING spacing and enlarging details of deleted section or enlarging other sections to fit in empty space. Change the order of the tiles. Draw picture to fit into the grid using the correct proportions. Match value and texture of the original
Option 4: Wavy Distorted View Find a source of interest. Draw a grid on source into equal spacing. Design a distorted grid by making the rows, columns or both making the straight lines wavy. Design the grid into a circle where the circles define the rows and the pie shapes for the columns. Draw picture to fit into the grid using the correct proportions. Match value and texture of the original.
From Kevan Nitzberg - High School Another subject that worked with high school students was one that initially was based Chuck Close and his video on his portrait paintings that are based the grid method. I took digital pictures of my students that were quite good (digital cameras have come a long way since they originally were introduced to the scene), and printed them out on regular copy paper. Using acetate from a roll that normally is used for protecting art work in a mat, I used a fine point permanent marker to create a 4 X 5 inch grid (1" squares) for each student to place over their printed out self portrait. They then had to blow up their image 400%, so that each grid on the final drawing was 4" square (4:1 ratio). The students had to first draw the outline of their heads keeping track of where the line that denoted the resulting shape existed in each of the squares that it ran through. Once the outline was done, they then had to look for the highlights and the shadows and draw them lightly as additional shapes in their compositions. The lightest and the darkest areas were noted to provide them with a range of contrast from light to dark. As the background in each portrait was dark due to the lighting that I used in the initial taking of the pictures, their backgrounds were also to be done dark to increase the contrast in the drawing. The assignment was done in pencil, working with a range of HB to 6B leads. The results of this assignment were quite good, but I wanted my students to push the portrait idea further and so a 2nd assignment was to be attended to where they had to concentrate on the emotional aspect more than the likeness in the composition. Rather than simply using pencil, they used pastel chalks to work on this assignment. I retook their pictures having them express the emotion that they wished to convey in their drawings, and then had them work with the grids again, but this time they had much more openness in terms of how they wished to deal with the images. In preparation for working on this assignment, they had to create a collection of portraits done by other artists using the Art Collector feature in Artsconnected (http:www.artsconnected.org), and see how a variety of artists used exaggeration of various elements and principles of art to convey feeling. The results of this assignment were extraordinary as students used color, line, repetition and exaggeration of features, 'styling' suggestive of other artists' work (most notably Picasso), and even collage to create the 2nd portrait. The freedom to express and create that was unleashed in this assignment paid off huge dividends in terms of the results that were realized. The excitement of the students from being able to successfully complete both of these assignments was quite tangible. Kevan Nitzberg
Anamorphic Art Online Resources
"ANAMORPHIC IMAGES are those in which the painted image of an object has been distorted in such a way that the object becomes recognizable only by viewing it at an oblique angle or in some curved reflecting surface. Anyone who has visited the National Gallery in London might have seen Hans Holbein's painting "The Ambassadors," in which an odd shape at the bottom of the canvas is seen to be a skull when viewed almost edge-on. Anamorphic images were something of a rage in the Renaissance, and Leonardo and Durer tried the technique as part of their studies of perspective. An eighteenth century innovation was to create anamorphs of paintings by famous artists. A seventeenth century book by Jean-Francois Niceron worked out the geometrical algorithms for producing anamorphic art (the planar and conical cases are pretty easy but cylinders are quite challenging), but this mathematical connection was lost through the centuries. Now, scientists at Guelph University (Ontario, Canada) have re-derived the transform equations needed for producing anamorphs. (Hunt, Nickel, Gigault, American Journal of Physics, March 2000" (from American Institute of Physics )
NOTE: These links were all active when lesson was put online. Report broken links and suggest additions.
"Masters of Illusions" video: information
Art of Anamorphosis
Math Connections: Math Year 2000
Math Year 2000 - Anamorphic Art
Plane Amorphic Art
Grid warping:
Albrecht Durer - grid warping
Op Art
Hans Holbein "The Ambassadors" high quality image
What is an anamorphic image? uses a poor image of the Ambassadors
More info on Hans Holbein's The Ambassadors:
Hans Holbein: The Ambassadors lengthy critique
Erhard Schon - Vexierbild or Puzzle Picture (1535). a plane anamorph
István Orosz Hungarian artist Click on images See Art of Orovitz (Orosz)
Scroll down on this page for another example by Itsván Orosz - "The Well" -
reveals a portrait of Escher
Getty Devices of Wonder (using a cone shaped mirror)
Cone shaped mirror image (Getty Devices of Wonder Exhibit )
Unit: Drawing/Renaissance Art