Created by Traci Blazosky www.glogstergirl.com
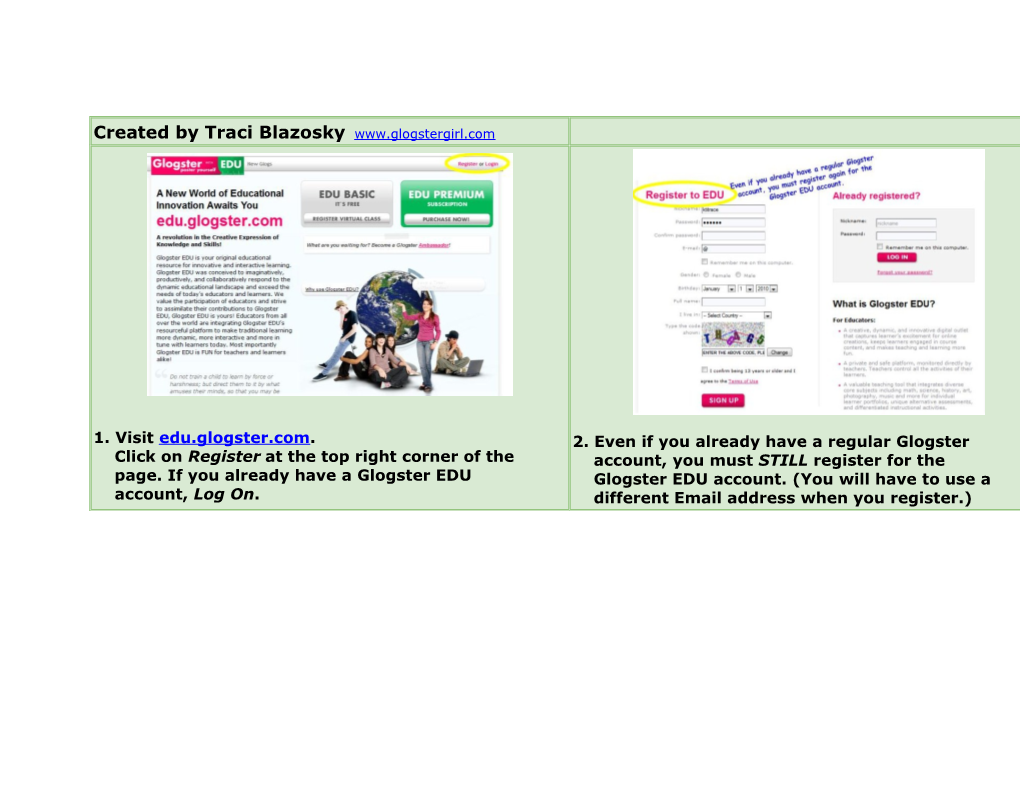
1. Visit edu.glogster.com.
Click on Register at the top right corner of the
page. If you already have a Glogster EDU
account, Log On. /
2. Even if you already have a regular Glogster
account, you must STILL register for the
Glogster EDU account. (You will have to use a
different Email address when you register.)
3. Fill in all of your information. Click SIGN UP. /
4. You will see your Dashboard. This is the page where
you can edit your profile, account settings, upgrade
to EDU Premium... or most importantly, CREATE A
GLOG!
5. When you scroll down the page, you will see
your Students. You can add new students at any
time. (Up to 100 with Basic Account) /
6. This is where your message will appear with your
student account information.
7. The student nicknames and passwords will be a
letter/number combination. This is the nickname
your student will log in as. You are able to change
the password. /
8. If you click on SHOW ALL, you can edit student
names, passwords, or delete students.
9. Click on EDIT to change the full name of the student.
This information will not appear on the student's
profile page, it is for statistical purpose only. /
10. Click on CHANGE PASSWORD to change the
password.
11. Now the fun begins! Click on CREATE A NEW
GLOG to begin! /
12. Use the black tool box to create you Glogster.
Begin with the WALL, it sets your background.
Keep building from there! Be creative and have
fun!
13. Change the layout, or click EDIT to make more
changes. /
14. Change the color, font style, or add a link.
Click OK when done.
15. When adding a Link, paste the URL in the box.
YOU WILL NOT BE ABLE TO VIEW THE LINK
UNTIL AFTER YOU SAVE/PUBLISH THE PAGE! /
16. You can change the Font, Allignment, Size,
and Color here. Make sure you click APPLY at
the bottom to save your changes!
17. If choosing IMAGE, VIDEO, or SOUND you will
upload the file. /
18. When adding an IMAGE, be sure to click on the tab
to add a FRAME to enhance the appearance.
19. When adding a VIDEO or SOUND, be sure to click
on the tab to add a PLAYER to enhance the
appearance. /
20. Click SAVE and PUBLISH to save your Glog.
21. Name your Glog. Pick a category for it and
set your Glogster's privacy to Public or Private.
You may also choose to tag your Glog.Then,
SAVE it!
/
22. If posting your Glogster in a WIKI... click VIEW
THIS GLOG. DO NOT USE THE EMBED CODE ON
THIS SCREEN.
23. Scroll to the bottom, and click EMBED INTO
YOUR PAGE. /
24. Use this code to embed on your
WIKI/Webpage. You can change the height
and width of your Glogster also.
25. Want to learn more? Check out Traci’s wiki page,
Glog on in the Classroom, at
http://kti2009.wikispaces.com/Glogster . / 26. You may also want to view presentations from
the Glog Summit at
http://www.slideshare.net/ktitraci/glog- summit?from=ss_embed
Created by Traci Blazosky Www
