Creating audio slideshows
These audio slideshows have been created using Microsoft PowerPoint with the Adobe Presenter add-in. You’ll need to have reasonable skills using PowerPointand be familiar with the Presenteradd-in. Here’s how you to do it.
- Create a storyboardfor your slideshow
You’lluse this storyboard to help you to synchronize the audio and images.
- In a Word document insert a table like the one below. Copy your audio transcript into the ‘Transcript’ column and images into the other.
- Highlight the word that will trigger the appearance of thatimage.
Transcript / Graphics
- What does a project manger need to consider when planning the construction of a building?
activities_3.jpg
development.jpg
- Create the PowerPoint file
- Open the PowerPoint template. Select Save As and name and save your file to your preferred location.
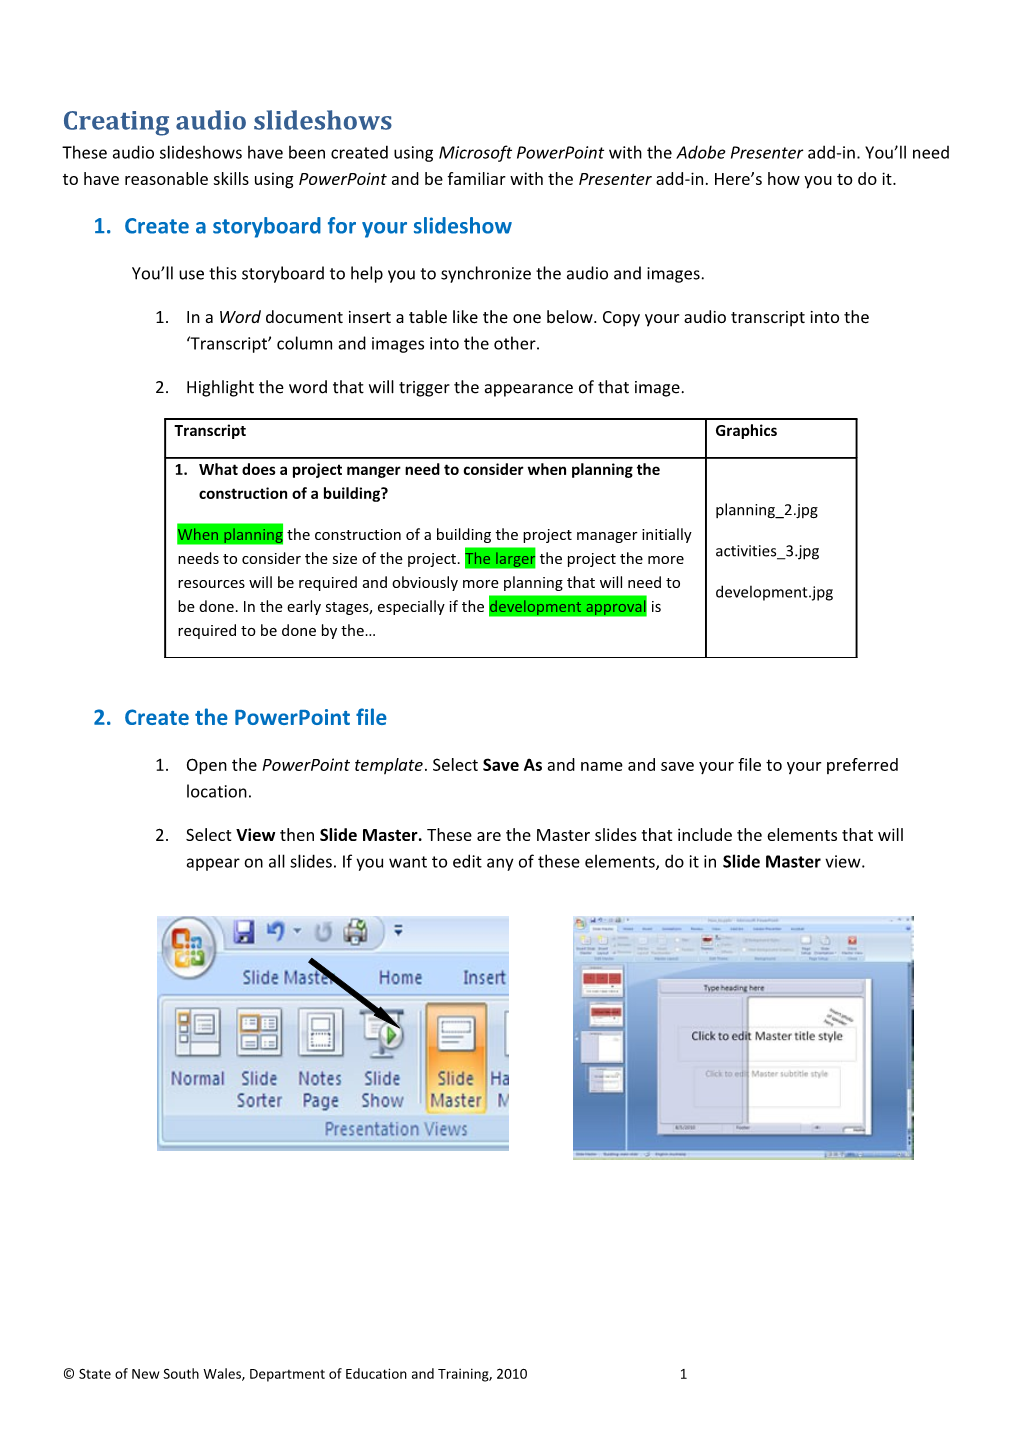
- Select Viewthen Slide Master. These are the Master slides that include the elements that will appear on all slides. If you want to edit any of these elements, do it in Slide Master view.
These include title page images, heading, Intro text and photograph of interviewee.
2.Add the slides and navigation in PowerPoint
- Select View then Normal to insert as many slides as required. Each question requires a separate slide.
- Createnavigation on one slide (usually Slide 2). To do this, copy up to six text boxes and type questions in each. Align the textboxes by selectingeach one thenselectArrange then Align.
- To show which question is active, select the appropriate question text box, then Format/Shape outline.
- Now link the navigation. To do this, first selecteach question textbox. Then select Insert Hyperlink. Select Place in this document and choose the appropriate slide number.
- Remember to hyperlink all questions before copying all the textboxes to the other slides.
- Copy audio transcript for each slide in Notes.
- On each slide insert the images and/or textboxes for the slideshow.
- To make images and text appear and disappear, select Animationthen Custom Animation for each image or textbox.
Suggested settings for custom animation
- Set Animations to Fade / Medium
- Set sequence of animations as follows:
- Start ‘on click’
- Exit ‘on click’
- Start ‘with previous’
- Exit ‘on click’
- Start ‘with previous’
3.Add the audio in Presenter
You can add existing audio files or record your own audio on each slide.
- To add WAV or MP3 audio files, select the Adobe Presentertab thenAudio/ Import
- insert one audio file per slide
- to synchronise audio and graphics select Audio/Sync
- Import notes or refer to your Storyboardto synchronise the audio and animated images.
- To record your own audio, select the Adobe Presentertab thenAudio/Record
- follow the instructions to set up your microphone properly
- place the microphone close and slightly to the side of your mouth
- listen to your recording. Select Audio/Editto edit your audio.
- Import notes or refer to your Storyboardtosynchronisethe audio to graphics/animations
4.Before you publish
Before you publish, adjust the Presenter settings so your audio slideshow works correctly.
- Select the Adobe Presenter tab then Slide Manager
- For all slides select Advance by user:Yes
- Select Settings/Playback andselect Auto play on start
- If you want to add an attachment, select Attachments and add the file.
Colours and themes
- To choose colour themes, select Settings / Appearance / Theme editor
- Select or de-select various features and colours
5.Publish in Presenter
Select the Adobe Presenter tab then Publish. Remember to choose a suitable location to save your Presenter files.
© State of New South Wales, Department of Education and Training, 20101